 |
| Alto 12" PA Speaker |
 |
| Martin Klimas |
 |
I set the speaker on a milk crate (depending on how high the paint goes I will change the height to an easier working height) I put a sheet over the ground and another held up by two poles to protect the wall. For the sides I am using large polystyrene boards with a silver reflective coating. These will contain the flying paint and also act as an easy to use large reflector that I can bounce light off to soften and use as fill.
The speaker was at an annoying height so I raised it with another crate and put the new latex frame and sheet that I made over the top. I placed two flashes on a stand together on the right hand side of the speaker at a 45 degree angle, another flash above those two but on an acuter angle. I placed the last flash on the left hand side for fill light. I hope to create a soft shadow on the left hand side of the paint sculpture and the three flashes on the right hand side should be sufficient to cast it. All of the flashes have their wide angle lens popped down under the diffusers and I have placed black card blocking the light from hitting the background to black it out.
I put a plank of wood on two stands for a table and connected the speaker up to the Sony amp and the computer tethered to the camera and amp to generate frequencies.
I setup my Canon 5D mkIII with a Sigma 150mm f/2.8 on a tripod, focusing rail and connected my remote release. I put around 10 spoonfuls of paint on the latex in the center for a first test and played 110hz through at "2" on the volume control of the amp.
This is the image that was captured with a delay of 25ms. The delay was way to short, the maximum height that the paint reached was around 2", to photograph that it would need a delay of around double what it is currently.
After 3 more photos of refining the delay and volume for 110hz, I ended up with this. With a delay of 65ms and upped the volume to "4".
After a few more photos there wasn't too much paint left on the latex so I mixed up some more with what I got from school.
I wanted to do bigger everything so I added loads more paint onto the latex this time and put some layers of different colours on there.
And this is what I got, I also changed the delay to 65ms and volume to "4.3".
After the first photo the green overpowered all the other colours. I pushed all the paint back into the middle of the speaker and then put some water around the outside to see the effect. I also changed the hertz from 110 to 60 and volume to "4.5".
I wanted to see the setup to, so I moved the tripod back.
I changed the delay to 85ms, recomposed and moved all the paint back into the middle.
The paint made this round formation because I didn't move it all back into the center.
Recomposed once again to see the height.
This is how the paint spreads from the frequency and the amount of mess (its a lot worse on the floor and walls).
I wanted to see how high the paint would go. I turned all the lights on and set the camera to video. The whole sculpture went around 60cm high. This means I can set the delay for a lot longer to see the maximum height!
I want to try shooting the video at 60fps or with a camera with higher speeds and slow it down.
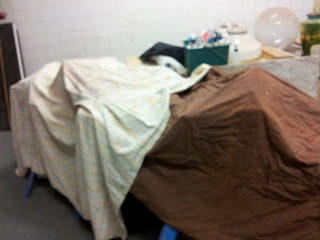
After cleaning up the majority of the paint I put drop cloths over the whole setup to keep the dust off (it will be a while before I get to take more photos and the location is very dusty. + expensive equipment!)


No comments:
Post a Comment